Friday, November 30, 2018

Creating a “zero byte” MXD file to use with any version of ArcGIS

Creating a “zero byte” MXD file to use with any version of ArcGIS

by Patrick Moore


Sharing models across various versions of ArcGIS can occasionally present a challenge when utilizing Innovyze's non-workgroup products such as InfoWater, InfoMaster, InfoSewer, and InfoSWMM. Specifically, difficulties may arise when a model created in a newer version of ArcGIS is opened in an older version, often resulting in an error message indicating that the file cannot be opened.

To overcome this compatibility issue, a practical workaround involves the creation of a "zero-byte .mxd" file. This file, devoid of any ArcGIS-specific data, ensures that the model database from the IWDB or ISDB folder can be utilized in any version of ArcGIS. Here are the steps to create a zero-byte .mxd file:

  1. Locate the Model: Use Windows Explorer to navigate to the folder containing the model you plan to share.

  2. Create a New Text File: Right-click within the folder, select 'NEW', then 'Text document' to create a new text file.

  3. Copy the Original MXD File Name: Copy the name of the original .mxd file you want to replace (for example, 'model1.mxd').

  4. Rename the Original MXD File: Either delete the original .mxd file or rename it by appending '-old' to its name (for example, 'model1-old.mxd').

  5. Rename the Text File: Paste the copied name to rename the newly created text file, ensuring it has the .mxd extension (for example, 'model1.mxd').

    Note: To change the file type, ensure that Windows is set to display file extensions. If you only see 'New Text Document' instead of 'New Text Document.txt', you might need to adjust your Windows settings to display file extensions.

  6. Confirmation: If a warning pops up asking you to confirm the extension change, click 'yes'.

  7. The Zero-Byte MXD File: Your new text file is now a .mxd file with zero content and zero-byte size. It's crucial not to open this file in the newer version of ArcGIS, as this might add ArcGIS-specific data, negating the purpose of the zero-byte file.

  8. Open the File in an Older Version of ArcGIS: On the computer with the older version of ArcGIS, simply double-click the zero-byte .mxd file to open and initialize the model as you normally would.

  9. Reset Display: After opening the model, you might need to hit the 'Reset display' button (symbolized by a yellow palette with an arrow) to update the model layer's color coding to default values.

This approach is often a simpler alternative to using the 'Save a Copy' feature, which requires you to copy the model database folder and match the name of the new .mxd file. It can save you a considerable amount of time when encountering ArcGIS versioning issues.

Remember, this process applies to any Innovyze non-workgroup products that operate as extensions in ArcGIS, including InfoWater, InfoSurge, InfoMaster, InfoSewer, and InfoSWMM.

Poetic Version

Ah, the artful dance of data interchange across varied versions of ArcGIS. If only it were as simple as a melody whispered on the wind. Yet, when navigating the intricacies of Innovyze's non-workgroup treasures such as InfoWater, InfoMaster, InfoSewer, and InfoSWMM, the symphony of compatibility occasionally hits a discordant note. A model, birthed in the vibrant youth of a new ArcGIS version, resists regression, stubbornly refusing to dance to the more seasoned rhythms of older versions.

Fear not, dear modeler, for within this maze of digital dialects, there exists a harmonious solution. It comes in the form of a “zero-byte .mxd” file, as insubstantial as a whisper yet as potent as a key that can unlock the door to any version of ArcGIS. Bereft of ArcGIS's specific imprints, this versatile file grants access to the sacred knowledge contained within the IWDB or ISDB folders, across all ArcGIS's temporal variations.

Let us embark on the magical journey of creating this zero-byte .mxd file:

  1. Set the Stage: With Windows Explorer as your map, voyage through the digital seas to the island holding your model.


  2. Summon a Tabula Rasa: Call forth a new Text Document into existence, a vessel waiting to carry your model's essence across the version sea.


  3. Capture the Echo of the Past: With delicate precision, copy the name of the original .mxd file, this beacon from the past guiding us towards compatibility.


  4. Transmute the Original: Gently, either cast aside the original .mxd file into the abyss or bestow upon it a new identity suffixed with '-old', a gentle nod to its enduring service.


  5. The Metamorphosis: Apply the copied name to your new text file, marking it as the new bearer of the .mxd torch.

    Note: Only in the realm where file extensions are visible to the naked eye can this metamorphosis truly take place.


  6. Embrace the New Form: When Windows casts doubt upon your renaming efforts, stand firm and affirm the transformation.


  7. Birth of the Zero-Byte MXD: Your humble text file has ascended, taking on the guise of an .mxd file with zero content and zero-byte size. It is a silent echo of the original, ready to navigate the seas of different ArcGIS versions.


  8. Journey to the Past: Board your vessel on the older version of ArcGIS. The gentle double-click of your mouse summons the spirit of the model into this older realm.


  9. Awaken the Colors: Upon arrival, strike the 'Reset display' button, a digital phoenix, to breathe life into the model layer's color palette, aligning it to the rhythm of default values.

In this dance across the versions, this melodious method often outshines the more laborious 'Save a Copy' performance. It elegantly weaves through the threads of ArcGIS versioning issues, saving you both time and effort.

This beautiful ballet can grace any stage set by Innovyze non-workgroup products that perform as extensions in ArcGIS, be it InfoWater, InfoSurge, InfoMaster, InfoSewer, or InfoSWMM. So, fear not the versioning dance, for you are now equipped with the harmony of the zero-byte .mxd file. Dance on, dear modeler, dance on.

Friday, October 26, 2018

The development of SWMM 5 was pursued under a Cooperative Research and Development Agreement between the Water Supply and Water Resources Division of the U.S. Environmental Protection Agency and the consulting engineering firm of Camp Dresser & McKee Inc


Software availability

Storm Water Management Model (SWMM) is freely downloadable from https://www.epa.gov/water-research/storm-water-management-model-swmm#downloads. SWMM was first developed in 1971 and has undergone several major upgrades since then. In this study we are using the Version 5.0 (SWMM 5). The development of SWMM 5 was pursued under a Cooperative Research and Development Agreement between the Water Supply and Water Resources Division of the U.S. Environmental Protection Agency and the consulting engineering firm of Camp Dresser & McKee Inc. The project team consisted of the following individuals: Lewis Rossman (contact information unknown) Trent Schade (contact information unknown), Daniel Sullivan (contact information unknown) from US EPA; Robert Dickinson (e-mail: robert.dickinson@gmail.com, address: 9340 Pontiac Drive Tampa, Florida 33626, phone: 813-712-0664), Carl Chan (e-mail: chanCC@cdm.com, address: 151 North Delaware St., Suite 1520, Indianapolis, IN 46204), Edward Burgess (e-mail: burgessEH@cdm.com, address: 8805 Governor's Hill Drive, Suite 260, Cincinnati, OH 45249) from CDM. SWMM 5 is designed to run under the Windows operating system of an IBM/Intel-compatible personal computer, the program language is C and the size is 5 MB.

Saturday, October 20, 2018

How to view an InfoSewer, InfoSWMM or InfoWater network without InfoSewer, InfoSWMM or InfoWater

How to view an InfoSewer, InfoSWMM or InfoWater network without InfoSewer, InfoSWMM or InfoWater

Use Arc Map, add the Map Subfolder from the IEDB, IWDB or ISDB folder for the network.  

You will see the network on your screen and Map.


An easy test for SWMM5 versions using the Status Report Message for Unrecognized Keywords in past SWMM5 GUI

An easy test for SWMM5 versions using the Status Report Message for Unrecognized Keywords in past SWMM5 GUI

SWMM 5.1.012 reading SWMM 5.1.013 Inp Files

SWMM 5.1.011 reading SWMM 5.1.013 Inp Files
SWMM 5.1.010 reading SWMM 5.1.013 Inp Files
SWMM 5.1.009 reading SWMM 5.1.013 Inp Files
SWMM 5.1.008 reading SWMM 5.1.013 Inp Files
SWMM 5.1.007 reading SWMM 5.1.013 Inp Files
SWMM 5.1.006 reading SWMM 5.1.013 Inp Files


New Features in Innovyze SWMM 14.6 Update 1

New Features in Innovyze SWMM 14.6 Update 1
  1. Added missing conduit type to RTC tables in DB Editor.
  1. Added the ability to use H2S in the SWMM5 Treatment Equations even though H2S is an internal variable in InfoSWMM
  1. Fixed an issue about importing OUTLET Link Tabular/Head features into InfoSWMM SA. It now imports correctly.
  1. Fixed an issue with evaporation being used with SCS Hydrology in the InfoSWMM SA Engine. Now, runoff, infiltration and evaporation are all part of the Runoff Summary.
  1. Fixed run with exact value for RDII Analyst
  1. Skipped the locking files for cache DB sync.
  1. Updated copyright year to 2018.
  1. Introduce new cache DB mechanism.
  1. A fix to the Node Treatment Equation and a fix to the Link Loading Tables. You can now use _H2S to have additional treatment equations for H2S modeling.
  1. Fixed the issue that stored graphs gets reset and the issue of empty combo box.
  1. A fix to the SWMM5 import for InfoSWMM to allow routing time steps less than 1 second. You cannot use time steps to 0.001 seconds.
  1. Add support for importing data file with Unicode encoding.
  1. A fix to the extended graphing parameters for links in the report manager.
  1. Added some key ID messages for older InfoSewer to InfoSWMM imports - it now shows the ID of the problem Pattern or UH
  1. Fixed Conduit Group Graph crash caused by cross section view.
  1. The time stamp of the detailed report node, link and subcatchment time series at the end of the rpt file were out of sync. Many users rely on this table for custom statistical features.
New Features in Innovyze SWMM 14.6  

  1. New Laurenson Runoff Hydrology
  2. Conduit Cross Section View in the Attribute Browser
  3. Profile View in the Attribute Browser
  4. Layer Scale Options for layers
  5. Expanded Transect Chart
  6. Manhole Inlet View in the Attribute Browser
  7. Map Highlight
  8. More Background Map Options

How to Extract the Engine SWMM5 Calculated Slope in InfoSWMM

How to Extract the Engine SWMM5 Calculated Slope in InfoSWMM.  
The slope is a calculated value in SWMM5. 

Please see this other blog for the slope calculations in SWMM5

Step 1 – Run the model
Step 2 –  Load the Conduit Summary Table
Step 3 – The slope for an individual link is shown in the Attribute Browser in the Output section (slope is a fraction)
Step 4  - Copy the slope (percent slope) from the Conduit Summary Table to the Conduit Information Table
Step 5  - The slope can now be used outside of the SWMM5 engine to find adverse slopes.


New Features in Innovyze SWMM 14.6 - InfoSWMM and InfoSWMM SA

New Features in Innovyze SWMM 14.6
1.  New Laurenson Runoff Hydrology
  1. New Laurenson Runoff Hydrology
2. Conduit Cross Section View in the Attribute Browser
3. Profile View on the Map
4. Manhole Inlet View in the Attribute Browser
5.  Background Mas in InfoSWMM SA
6.  Highlight an Element in a Map (InfoSWMM SA)
7.  Layer Scale on the Map in InfoSWMM SA
8.  Expanded Transect Chart with Data


Privileged and Confidential Communication: This electronic mail communication and any documents included hereto may contain confidential and privileged material for the sole use of the intended recipient(s) named above. If you are not the intended recipient (or authorized to receive for the recipient) of this message, any review, use, distribution or disclosure by you or others is strictly prohibited. Please contact the sender by reply email and delete and/or destroy the accompanying message.

Initial condition polygon can be used to define a pond in InfoSWMM 2D

You can use an Initial condition polygon to define your pond as shown below for InfoSWMM 2D.  
There are two parts:
  1. The initial condition polygon with only area and
  2. The defined depth or elevation in the initial condition polygon.


Saturday, October 6, 2018

Query Report Manager for Customized Reports in InfoSWMM and InfoSWMM SA

Here is my suggestion to closely replicate your excel table of a mixture of input and output link variables:
  1. Run the model and then make an output relate of the Conduit Summary Table
  2. Create a DB Query (a Query is needed) based on finding ALL link data, I used length > 0
  3. Use the Tool Query Report Manager
  4. Select your needed mixture of Link Variables and Link Output Data
  5. Generate your table and customize the look
  6. Copy the table to Excel for further customization

Privileged and Confidential Communication: This electronic mail communication and any documents included hereto may contain confidential and privileged material for the sole use of the intended recipient(s) named above. If you are not the intended recipient (or authorized to receive for the recipient) of this message, any review, use, distribution or disclosure by you or others is strictly prohibited. Please contact the sender by reply email and delete and/or destroy the accompanying message.

Saturday, September 22, 2018

Conduit Names in the Pascal GUI of SWMM5

  // Short names and data field labels of available shapes
  XsectShapes: array[0..MAX_SHAPE_INDEX] of TXsectShape =
    (
     (Text: ('RECT_OPEN', 'Bottom Width', '', '')),
     (Text: ('TRAPEZOIDAL', 'Bottom Width', 'Left Slope', 'Right Slope')),
     (Text: ('TRIANGULAR', 'Top Width', '', '')),
     (Text: ('PARABOLIC', 'Top Width', '', '')),
     (Text: ('POWER', 'Top Width', 'Power', '')),
     (Text: ('IRREGULAR', '', '', '')),
     (Text: ('CIRCULAR', '', '', '')),
     (Text: ('FORCE_MAIN', 'Roughness*', '', '')),
     (Text: ('FILLED_CIRCULAR', 'Filled Depth', '', '')),
     (Text: ('RECT_CLOSED', 'Bottom Width', '', '')),
     (Text: ('HORIZ_ELLIPSE', 'Maximum Width', 'Size Code', 'Standard Sizes')),
     (Text: ('VERT_ELLIPSE', 'Maximum Width', 'Size Code', 'Standard Sizes')),
     (Text: ('ARCH', 'Maximum Width', 'Size Code', 'Standard Sizes')),
     (Text: ('RECT_TRIANGULAR', 'Top Width', 'Triangle Height', '')),
     (Text: ('RECT_ROUND', 'Top Width', 'Bottom Radius', '')),
     (Text: ('MODBASKETHANDLE', 'Bottom Width', 'Top Radius', '')),
     (Text: ('EGG', '', '', '')),
     (Text: ('HORSESHOE', '', '', '')),
     (Text: ('GOTHIC', '', '', '')),
     (Text: ('CATENARY', '', '', '')),
     (Text: ('SEMIELLIPTICAL', '', '', '')),
     (Text: ('BASKETHANDLE', '', '', '')),
     (Text: ('SEMICIRCULAR', '', '', '')),
     (Text: ('CUSTOM', '', '', '')),
     (Text: ('DUMMY', '', '', ''))
     );
Privileged and Confidential Communication: This electronic mail communication and any documents included hereto may contain confidential and privileged material for the sole use of the intended recipient(s) named above. If you are not the intended recipient (or authorized to receive for the recipient) of this message, any review, use, distribution or disclosure by you or others is strictly prohibited. Please contact the sender by reply email and delete and/or destroy the accompanying message.

Friday, September 14, 2018

How to fix depth vs elevation offset issues in links using InfoSWMM and InfoSWMM SA

Issue background:  You have offsets as depth instead of elevation in your SWMM5 model. 

Here is how you fix this:
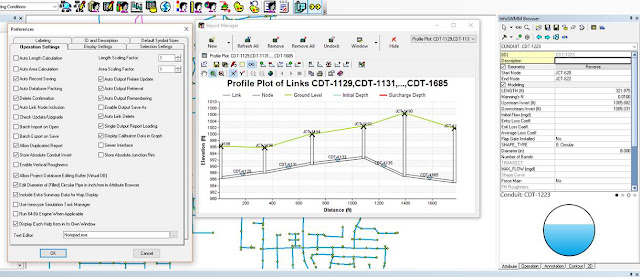
  1. Go to Project preferences and turn on Store Absolute Conduit Invert
  2. You offsets will now be elevations but will be off by a factor of 2
  3. Now, go to the Conduit DB Table and using the Block Edit tool divide the offsets by 2,
How to fix depth vs elevation offset issues in links using InfoSWMM and InfoSWMM SA


Privileged and Confidential Communication: This electronic mail communication and any documents included hereto may contain confidential and privileged material for the sole use of the intended recipient(s) named above. If you are not the intended recipient (or authorized to receive for the recipient) of this message, any review, use, distribution or disclosure by you or others is strictly prohibited. Please contact the sender by reply email and delete and/or destroy the accompanying message.

Monday, August 20, 2018

How to zoom to the extents of your model in InfoSWMM, InfoSewer and InfoWater

How to zoom to the extents of your model in InfoSWMM, InfoSewer and InfoWater – use the Arc Map Menu Command Data/Data Frame Properties/Data Frame.


Privileged and Confidential Communication: This electronic mail communication and any documents included hereto may contain confidential and privileged material for the sole use of the intended recipient(s) named above. If you are not the intended recipient (or authorized to receive for the recipient) of this message, any review, use, distribution or disclosure by you or others is strictly prohibited. Please contact the sender by reply email and delete and/or destroy the accompanying message.

The Goal of SWMM5 Input Files

 🌟 SWMM5 (Storm Water Management Model 5) is a widely used urban hydrology and hydraulic modeling software developed by the United States E...